Whole document tree
| [ < ] | [ > ] | [ << ] | [ Up ] | [ >> ] | [Top] | [Contents] | [Index] | [ ? ] |
5.1.5.1 Adjust Output
The Adjust Output button button pops up a non-modal dialog that allows adjustment of various parameters related to the print quality. These are independent of the controls within the GIMP itself and only affect the print.
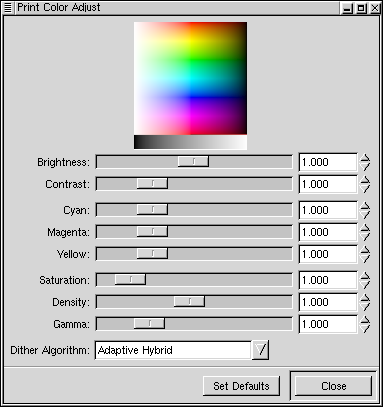
At the top of the window is a thumbnail of the image that changes to reflect the color settings of the image. This enables you to get an idea of how the image will print out as you adjust settings.
Below that there are eight sliders:
- Brightness
- (0--2.0, default 1.0) Adjust the brightness of the image.
- Contrast
- (0--4.0, default 1.0) Adjust the output contrast.
- Cyan, Magenta, Yellow
- (0--4.0, default 1.0) Adjust the cyan, magenta, and yellow in the
output. These should not normally need to be adjusted very much; even
very small adjustments can go quite a long way to restoring color
balance.
- Saturation
- (0--9.0, default 1.0) Adjust the color brilliance (saturation) of the
output. Saturation of 0 means pure gray scale, with no color.
Saturation of 9.0 will make just about anything but pure grays
brilliantly colored.
- Density
- (0.1--2.0, default 1.0) Adjust the density (amount of ink) in the print.
The density is automatically corrected for the particular printer,
resolution, and in some cases paper choices. If solid black in the
input is not solid in the print, the density needs to be increased; if
there is excessive ink bleed-through and muddy dark colors, the density
should be decreased.
Note: the density will not increase beyond a certain amount no matter what the slider is set to.
- Gamma
- (0.1--4.0, default 1.0) Adjust the output gamma. The gamma value is automatically corrected for the choice of printer; this is used if you believe the automatic setting is incorrect.
| [ < ] | [ > ] | [ << ] | [ Up ] | [ >> ] | [Top] | [Contents] | [Index] | [ ? ] |
This document was generated by Eric Sharkey on February, 16 2002 using texi2html