Index
Main window:
Color correction:
Standard options window
Advanced options window
Preview:
Batch scan:
Setup:
|
In the save mode an image is scanned and saved to a file.
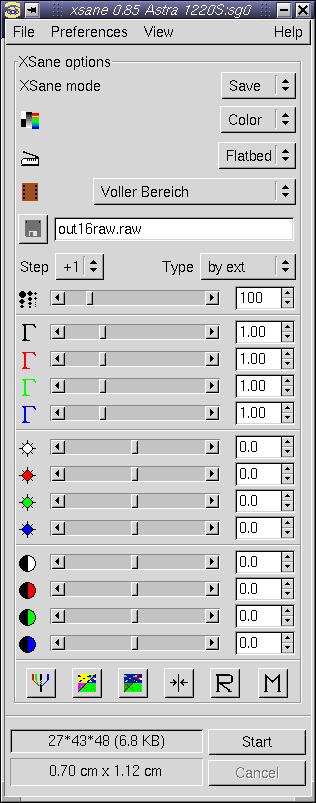
 Scanmode:
Select scanmode, e.g.: color, grayscale, halftone, lineart.
 Scansource:
Select scansource, e.g.: Flatbed, Transparency, Automatic Document Feeder.
 Scanmedium:
Select scanmedium, e.g.: slide, standard negative,
Agfa negative, ... or Full range.
 Scan resolution:
Select resolution that is used for scanning. If the backends makes available a
range of resolutions (e.g. 100-600 dpi) XSane can display a slider or a
list of resolutions. You select this via Preferences/Show resolution list.
The backend can define a list of resolutions insted of a range, in this
case it is not possible to enable the slider.
To select exact resolutions with the slider click the slider with the mouse pointer
and use the cursor keys to change the value in steps of 1, if you press ctrl
and a cursor key the step is 10.
 Select filename:
If you press the disk icon a browse dialog is opened where you can select the name
of the image file that is created when the next scan is done.
You also can enter the filename directly to the text box right to the disk icon.
If no path is entered XSane saves the file into the directory selected in
Preferences/Change directory.
Step:
If there is a counter in the filename (image-0001.jpg) the counter is increased by
the number selected in this box.
Type:
by ext means that the filetype is selected by the extension of the filename.
When you select a filetype in this box XSane automatically appends the correct
extension to the filename, you should not append a file extension in this case.
Supported filetypes:
Pnm and ps (and raw) are always available. The
other formats are only available if necessary libraries are present and
support is compiled in. For png you need libpng and libz, for
jpeg you need jpeglib, for tiff you need libtiff.
The raw format is a 16 bit binary format. Some programs can read
raw files as pnm-format. For the pnm format
only 8 bit binary and ascii and 16 bit ascii are defined. We suggest
not to use the raw format for storing images you want to view, it is
meant for post-processing with programs you write yourself. The advantage
is that this format produces much smaller files than the 16 bit ascii
pnm format does.
The supported output formats depend on the bit depth of the scanned image:
1 bit/pixel black/white mode:
pnm = pbm, png
ps, jpeg and tiff are converted to 8 bit grayscale mode.
8 bits/pixel grayscale mode:
pnm = pgm, png, ps, jpeg and tiff
16 bits/pixel grayscale mode (9-16 bits):
pnm (ascii), png, raw and tiff
24 bits/pixel RGB-color mode (8 bits/color):
pnm = ppm, png, ps, jpeg and tiff
48 bits/pixel RGB-color mode (9-16 bits/color):
pnm (ascii), png, raw and tiff
optional: (default: not compiled in)
32 bits/pixel RGBA-color mode (8 bits/color):
rgba (raw) and png with alpha channel
64 bits/pixel RGBA-color mode (9-16 bits/color):
rgba (raw) and png with alpha channel
|